初始化环境配置
PVE 服务器配置
每个 PVE 节点都要进行此节的相关配置
删除订阅弹窗
sed -Ezi.bak "s/(Ext.Msg.show\(\{\s+title: gettext\('No valid sub)/void\(\{ \/\/\1/g" /usr/share/javascript/proxmox-widget-toolkit/proxmoxlib.js && systemctl restart pveproxy.service重开浏览器(或使用浏览器无痕无痕模式)即可验证效果
替换 apt 软件源
参考链接:Proxmox - USTC Mirror Help
###### PVE 9 替换 apt 源(DEB822 格式)
# 屏蔽订阅企业源
mv /etc/apt/sources.list.d/pve-enterprise.sources /etc/apt/sources.list.d/pve-enterprise.sources.bak

# 若是通过一键安装脚本安装的 PVE,则无需进行此处的配置
# 修改基础系统(Debian)的软件源
sed -i 's/deb.debian.org/mirrors.ustc.edu.cn/g' /etc/apt/sources.list.d/debian.sources

# 修改 Proxmox 的软件源(PVE 9)
cat > /etc/apt/sources.list.d/pve-no-subscription.sources <<EOF
Types: deb
URIs: https://mirrors.ustc.edu.cn/proxmox/debian/pve
Suites: trixie
Components: pve-no-subscription
Signed-By: /usr/share/keyrings/proxmox-archive-keyring.gpg
EOF

# 修改 Ceph 的软件源
if [ -f /etc/apt/sources.list.d/ceph.sources ]; then
  CEPH_CODENAME=`ceph -v | grep ceph | awk '{print $(NF-1)}'`
  source /etc/os-release
  cat > /etc/apt/sources.list.d/ceph.sources <<EOF
Types: deb
URIs: https://mirrors.ustc.edu.cn/proxmox/debian/ceph-$CEPH_CODENAME
Suites: $VERSION_CODENAME
Components: no-subscription
Signed-By: /usr/share/keyrings/proxmox-archive-keyring.gpg
EOF
fi


###### PVE 8 替换 apt 源(source.list 格式)
:<<EOF
# 屏蔽订阅企业源
mv /etc/apt/sources.list.d/pve-enterprise.list /etc/apt/sources.list.d/pve-enterprise.list.bak

# 若是通过一键安装脚本安装的 PVE,则无需进行此处的配置
# 修改基础系统(Debian)的软件源
sed -i 's|^deb http://ftp.debian.org|deb https://mirrors.ustc.edu.cn|g' /etc/apt/sources.list
sed -i 's|^deb http://security.debian.org|deb https://mirrors.ustc.edu.cn/debian-security|g' /etc/apt/sources.list
# 修改 Proxmox 的软件源(PVE 8)
echo "deb https://mirrors.ustc.edu.cn/proxmox/debian/pve bookworm pve-no-subscription" > /etc/apt/sources.list.d/pve-no-subscription.list
# 修改 Ceph 的软件源
if [ -f /etc/apt/sources.list.d/ceph.list ]; then
  CEPH_CODENAME=`ceph -v | grep ceph | awk '{print $(NF-1)}'`
  source /etc/os-release
  echo "deb https://mirrors.ustc.edu.cn/proxmox/debian/ceph-$CEPH_CODENAME $VERSION_CODENAME no-subscription" > /etc/apt/sources.list.d/ceph.list
fi
EOF- 更新系统软件源列表、升级软件包(包含升级操作系统)
# 更新系统软件源列表
# 升级软件包(包含升级操作系统)
apt -y update && apt -y upgrade

# 升级操作系统
# apt dist-upgrade- 安装 sudo 命令
apt -y install sudo替换 CT Templates 软件源
# 替换 CT Templates 软件源
sed -i.bak 's|http://download.proxmox.com|https://mirrors.ustc.edu.cn/proxmox|g' /usr/share/perl5/PVE/APLInfo.pm
# 生效替换
systemctl restart pvedaemon
# /usr/share/perl5/PVE/APLInfo.pm 文件属于 pve-manager 软件包,该软件包升级后,需要重新替换 URL。
添加系统监控项
参考链接:GitHub - a904055262/PVE-manager-status
- 修改信息栏
GITHUB_MIRROR="hub.gitmirror.com/https://raw.githubusercontent.com"
wget -q https://${GITHUB_MIRROR}/a904055262/PVE-manager-status/refs/heads/main/showtempcpufreq.sh && \
  chmod +x showtempcpufreq.sh && \
  ./showtempcpufreq.sh
添加局域网 NTP 时间同步服务器
将局域网内的 NTP 服务器作为默认时间同步服务器,保证设备间的时间同步,因为 Ceph 节点之间允许的最大时钟漂移不得超过 50 ms。
# 编辑Chrony配置文件
sudo sed -i '/pool 2.debian.pool.ntp.org iburst/s/^/#/' /etc/chrony/chrony.conf
echo "server 192.168.0.1 iburst" | sudo tee -a /etc/chrony/chrony.conf

# 重启Chrony服务以应用配置
# 启用Chrony服务以确保在启动时运行
# 检查Chrony状态以确认服务正在运行
sudo systemctl restart chrony && \
sudo systemctl enable chrony && \
chronyc tracking && \
chronyc sources -v
# 显示当前时间源和同步状态
合并 local-lvm 分区到 local 分区
Proxmox VE 官方镜像会默认将系统盘划分为两个分区,这样很容易遇到一个问题:其中一个分区的存储空间可能已经用尽,而另一个分区却还有剩余空间。为了避免这种情况,在安装完操作系统后需要将这两个分区合并成一个,以便更有效地利用硬盘空间。
步骤如下:
删除 lvm 分区
lvremove -f pve/data将空出来的空间分给local
lvextend -l +100%FREE -r pve/root📌 位置:数据中心 → 存储
移除 local-lvm
📌 位置:数据中心 → 存储 → 编辑
调整 local
常规:存放内容全选
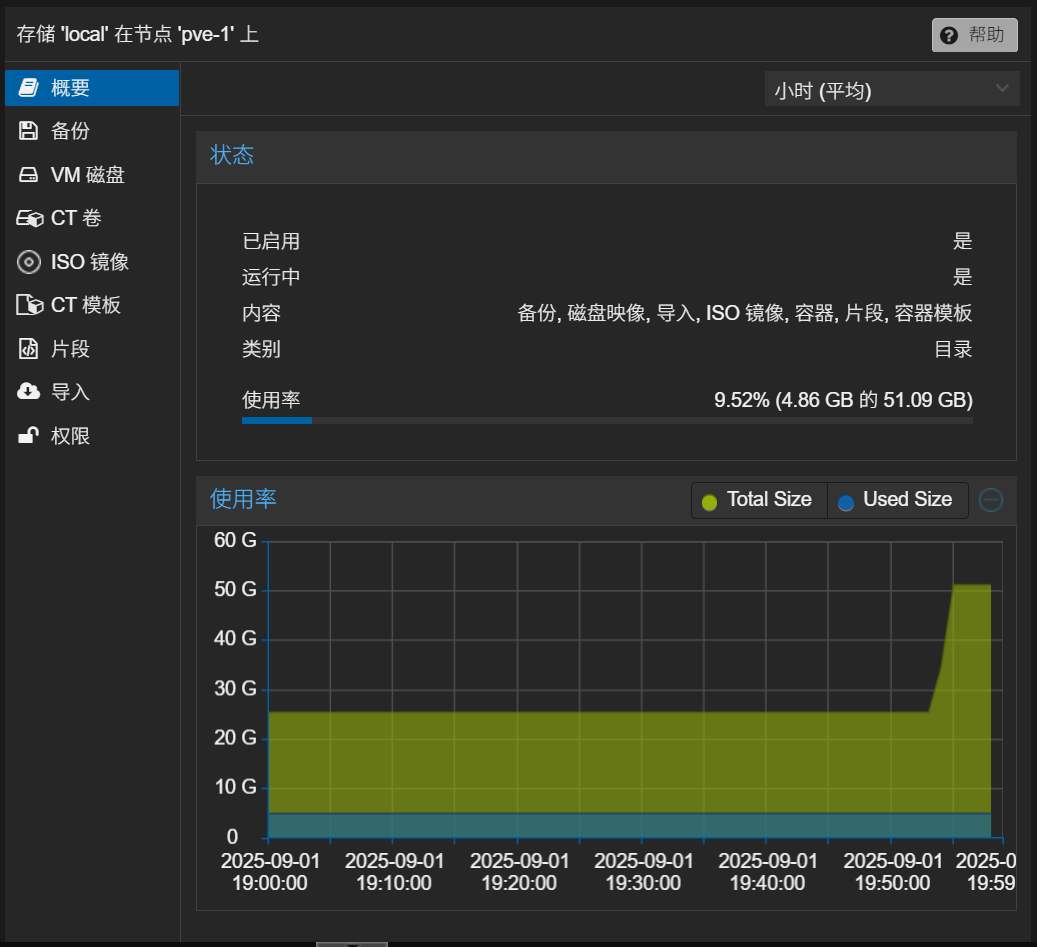
下图中容量只有 51GB 的原因是有部分容量分配给了 Swap 分区作虚拟内存

合并 local-lvm 分区到 local 分区
数据库服务器配置
设置免密 sudo 权限
切换为 root 用户
su -# 使用以下命令添加免密 sudo 规则
echo '%<USERNAME> ALL=(ALL) NOPASSWD: ALL' | sudo tee /etc/sudoers.d/<USERNAME>
:<<EOF 比如
echo '%tsanfer ALL=(ALL) NOPASSWD: ALL' | sudo tee /etc/sudoers.d/tsanfer
EOF重新登陆免密 sudo 用户
su - USERNAME

:<<EOF 比如
su - tsanfer
EOF
验证免密 sudo 权限:
sudo ls -la更新软件
sudo dnf -y update使用脚本初始化服务器
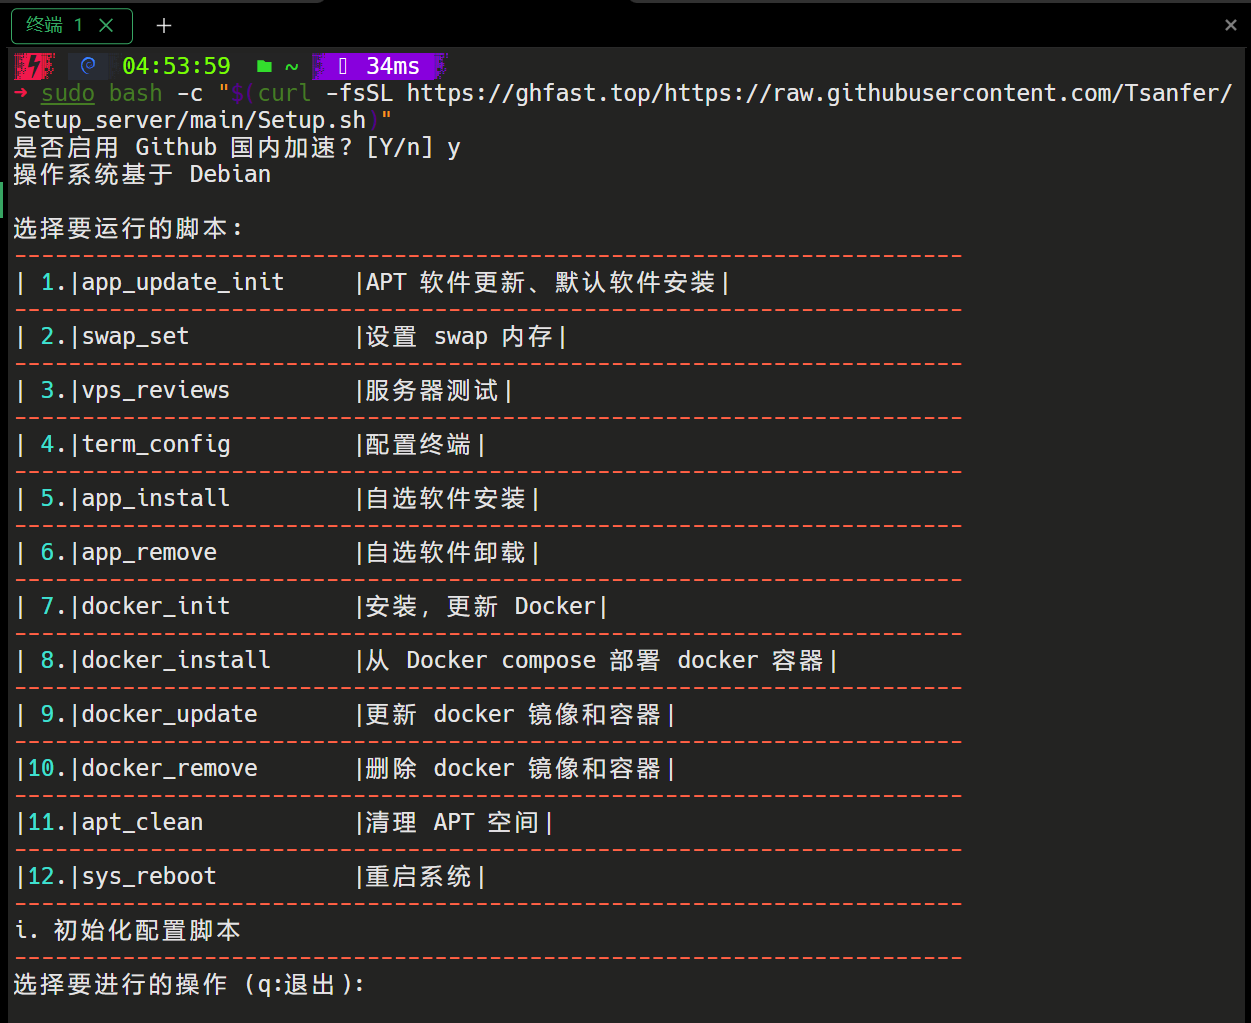
在此推荐作者本人编写的 Debian 服务器初始化脚本:Tsanfer/Setup_server: 个人 Debian/Ubuntu 服务器自动初始化脚本
if command -v curl >/dev/null 2>&1; then
    bash -c "$(curl -fsSL https://ghfast.top/https://raw.githubusercontent.com/Tsanfer/Setup_server/main/Setup.sh)"
elif command -v wget >/dev/null 2>&1; then
    bash -c "$(wget https://ghfast.top/https://raw.githubusercontent.com/Tsanfer/Setup_server/main/Setup.sh -O -)"
else
    echo "请先安装 curl 或 wget" >&2
fi
使用此脚本可完成以下操作:
APT 软件更新、默认软件安装(可选择是否更换系统软件源)
PVE 系统请勿通过此脚本更换软件源
配置 swap 内存
服务器测试
配置终端
自选软件安装/卸载
安装和更新 Docker
安装/删除 docker 容器
清理 APT 空间

